I’ve been watching a lot of Great British Bake Off recently and I’ve been really inspired by the layered cakes that they make - so much so that I’m wanting to experiment with some combinations of my own. Having never done this kind of baking before, however, I thought it would be a good idea to find a pre-existing recipe to practice building layers of flavor. I also want to keep it relatively health-conscious, so I want to limit how much I make at once and avoid too much refined sugar. And it needs to be dairy free! This blog post walks through the recipe I used and the result.
Required tools:
- Two 3” metal rings (at least 4” deep) or similar small dish
- Food processor
Note: The original recipe called for an 8” springform pan. I wanted to make a miniature version of the recipe with two of my 3” metal rings (just 2” deep each!), so I lined each ring with a 4” tall handmade aluminum foil ring and parchment paper.
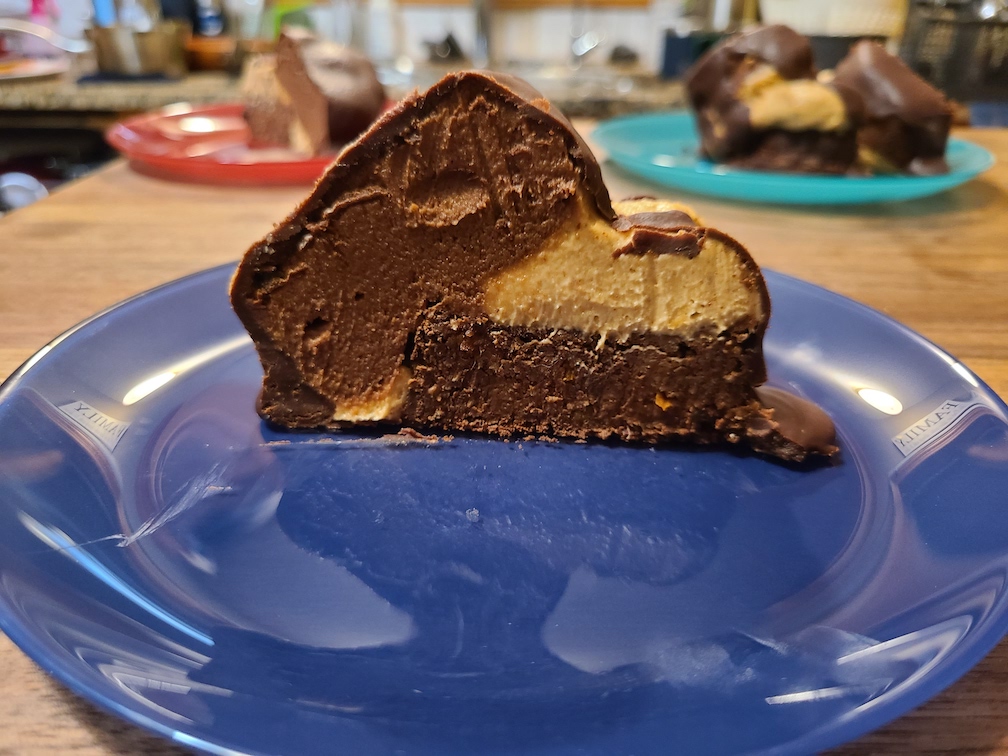
You might guess from the picture that this would bite me later, but the flimsy walls of my baking container actually weren’t the problem here…
The original recipe is the “Staple Celebration Cake” from Vegan Treats: Easy Vegan Bites & Bakes by Emma Hollingsworth. It’s actually the cover recipe on the book, so if you click the link you’ll quickly see what this cake is supposed to look like! I estimated that by volume I was making about a third of the amount of cake as the 8” springform pan version of the recipe, so the recipe below is modified accordingly with some additional minor variations.
Ingredients
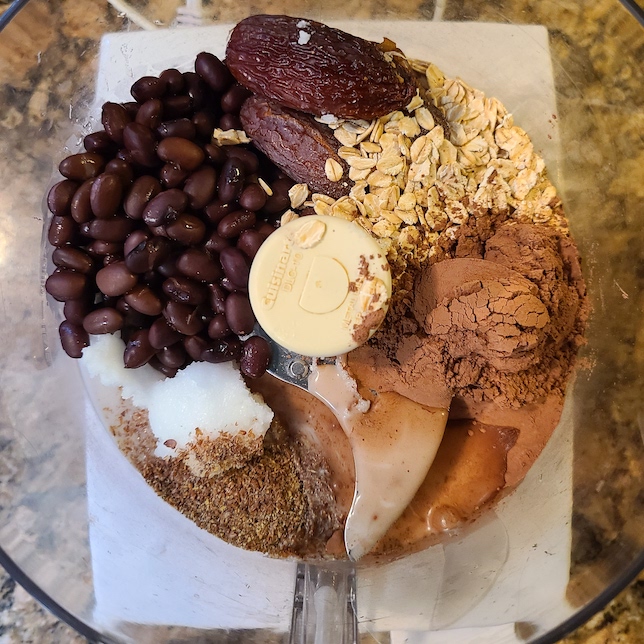
Brownie Layer 1
- 1 tbsp coconut oil
- 1/2 cup drained and rinsed canned black beans (less than 1 can)
- 3 pitted Medjool dates 2
- 3 tbsp rolled oats
- 3 tbsp cacao powder
- 3 tbsp non-dairy milk (I used cashew)
- 2/3 tbsp ground flaxseed
Peanut Butter Mousse Layer
- 1/3 cup peanut butter
- 3 pitted Medjool dates
- 1.5 tbsp coconut oil
- 1/3 cup non-dairy milk 3
- pinch of salt
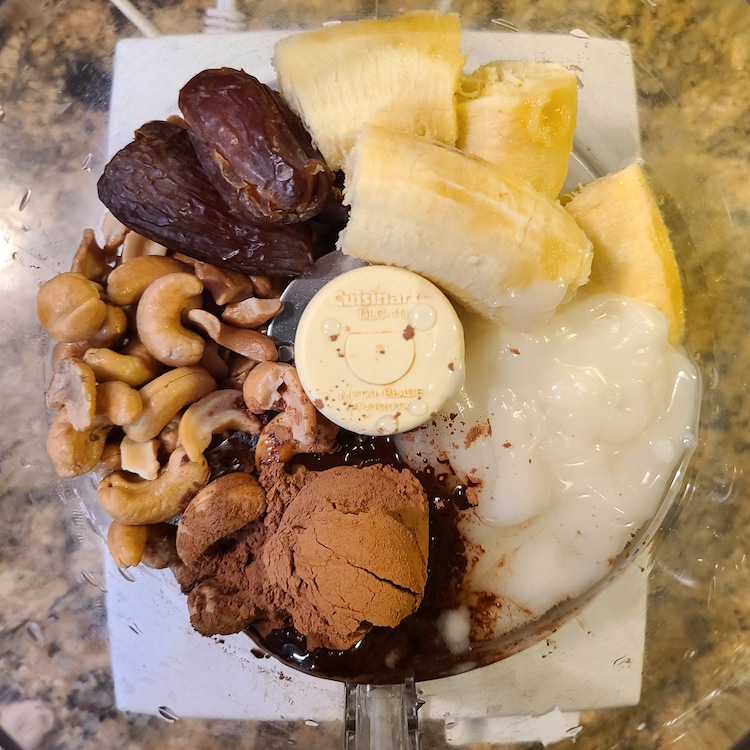
Chocolate Mousse Layer
- 1/2 cup raw cashews, soaked in hot water for one hour and drained
- 1/2 cup coconut cream 4
- 3 pitted Medjool dates
- 1 ripe banana, mashed 5
- 3 tbsp cacao powder
- 3 tbs coconut oil, melted
Ganache Topping
- 3 tbsp cacao powder
- 3 tbsp pure maple syrup
- 3 tbsp peanut butter
- 3 tbsp coconut oil, melted
Recipe
Before you get started, make sure your dessert containers are ready. I lined mine with parchment paper so that the cakes would release easily from the container, and set them on a silpat-lined cookie sheet. The sheet needed to fit in my oven AND my freezer, so that’s a good thing to keep in mind as you’re getting set up.
Brownie Layer
Preheat the oven to 350 degrees.
Process all of the brownie ingredients in the food processor for a few minutes until smooth. Spoon the mixture into the prepared containers and bake for 35 to 40 minutes until a toothpick inserted into the center comes out clean. Allow for the brownies to cool before popping into the freezer while you make the mousse layers.
Peanut Butter Mousse Layer
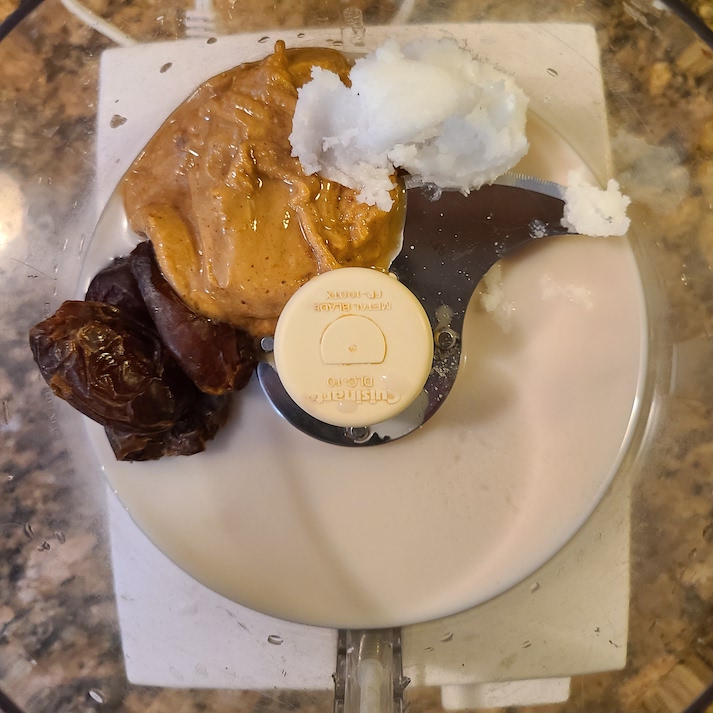
Process all of the peanut butter mousse ingredients in the food processor for a few minutes until smooth. Remove the brownies from the freezer and spoon an even layer of the peanut butter mousse over the brownies in each container, and return to the freezer for at least an hour 6 to set.
Chocolate Mousse Layer
Don’t rush to make this layer! The peanut butter mousse needs some time to set before this layer can be added. So drink a glass of wine, turn on some music and have a dance - or jump right into making this mousse and stick it in the fridge until you’re ready to use it.
Process all of the chocolate mousse ingredients in the food processor for a few minutes until smooth. Remove the containers from the freezer and spoon an even layer of the chocolate mousse in each container, and return to the freezer for at least an hour to set.
Ganache Topping
Combine the ganache ingredients in a bowl until smooth and well combined. Let rest for a few minutes to cool - ganache should not be hot for the next step. Remove the containers from the freezer and spoon an even layer of ganache in each container, and return to the freezer for an hour or more to set. Once set 7, you can remove the cakes from their containers and serve, or store in the freezer.
The original recipe advises that you can keep these in the freezer for up to 2 months, but try and wait two months to eat these!
Notes
-
The brownies weren’t my favorite, and they were definitely carried by the other layers (especially the peanut butter mousse, which I plan to integrate into other recipes!). ↩
-
I used some older dates in the brownie recipe that were a little tougher, and my food processor couldn’t handle one of them and I had to replace it. If you’re not sure whether your dates are fresh enough, try to tear each one with your hands - if it tears easily, you don’t need to soak them. If it doesn’t, it’s probably worth it to soak for an hour in hot water before using. ↩
-
I used cashew milk as my non-dairy milk. ↩
-
I used Coco Reàl Cream of Coconut. ↩
-
The original recipe called for avocado here, but I didn’t have a ripe one - so I used banana. It was a fine sub texture-wise, but I didn’t love the flavor that it added. It effectively made this chocolate banana mousse. Maybe applesauce would have been a better sub? ↩
-
Are you thinking what I’m thinking? Does it really need an hour to set?? It turns out that this peanut butter mousse DEFINITELY does, and only freezing it for the period of time it takes you to clean out your food processor and make the chocolate mousse will not be enough. If you need proof, check out the photo of my finished product. ↩
-
My second mistake was taking the cakes out of the containers to add the warm ganache - it wouldn’t have gone well given that the peanut butter layer wasn’t given enough time to set, but it was worse pouring warm ganache on top without the security of the foil rings. ↩